|
Setting
up Directories for Sintendo Beta v0.10
|
|
For Sintendo to run properly on the Dreamcast, the following files must be available on the CD:
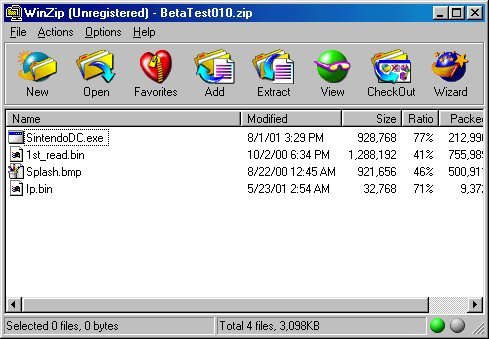
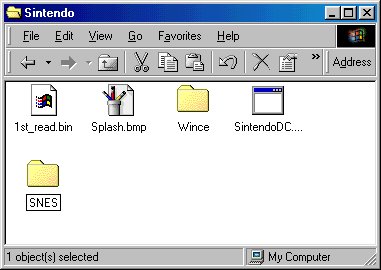
The following tutorial describes how to set up these files in appropriate places to prepare Sintendo for burning. Start by creating a directory. If you will be burning Sintendo using Nero, I recommend creating a direcoty called C:\Sintendo or C:\My Documents\Sintendo, though it may be placed anywhere on your hard drive you desire. It is recommended that you create a new directory for this to seclude it from other files on your hard drive. If you will burning Sintendo using CDRECORD, I recommand creating a directory called C:\Selfboot\Sintendo or C:\My Documents\Selfboot\Sintendo. If you have previously used the Echelon self-boot kit to prepare other emulators, you may already have a Selfboot directory, and it may contain several files useful for burning Sintendo, such as cdrecord.exe and mkisofs.exe. It is important that the Sintendo directory be located inside another directory (the Selfboot directory) because storing CDRECORD one directory below the data desired for burning is the optimal way of going about burning self-booting games. If you have never used the Echelon self-boot kit or other such kits, you should create both a Selfboot directory and the create another directory within it called Sintendo. From this point forward, the directory you just created (probably called Sintendo) to store the Sintendo data for burning shall be called the Sintendo directory. For instructions specific to CDRECORD directories, the Selfboot directory will be refered to. These names should come to mean the full path of the directory(s) you created (for example, Sintendo directory = C:\Sintendo if and only if that it where you created this directory). Remember where you made this directory as you will come back to it many times. Setting up the Sintendo directory (CDRECORD Burning Only)If you have not already downloaded the ZIP file for Sintendo Beta v0.10, do so now. Use WinZip to open the file from wherever you downloaded it from. It should look something like this:
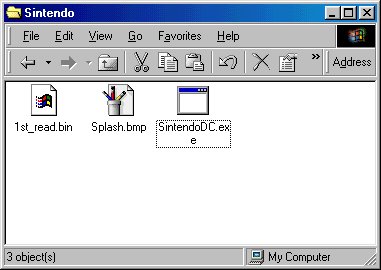
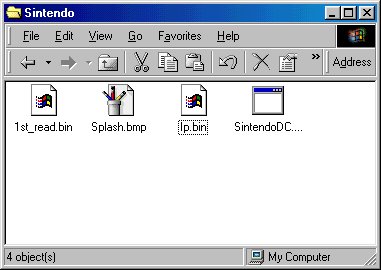
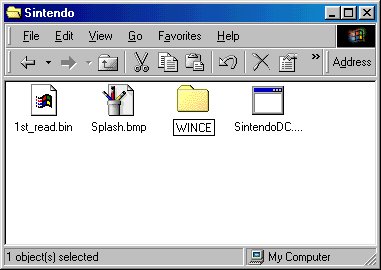
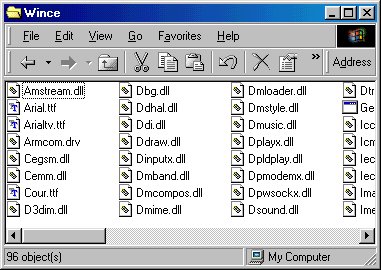
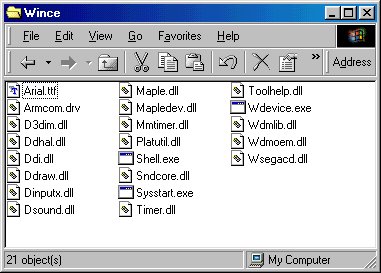
Shown here is the Beta Test version of Sintendo v0.10, which is the only version available at this date. The full Beta release will consist of more files (most being text files), but the only files you'll need for burning are shown above. You will notice how they correspond to the list of files at the beginning of this tutorial. Select these four files (if there are more than these 4 in the ZIP file, hold down Control to select multiple files, find these four files and make sure they are all select). Open your Sintendo directory in another window and drag these four files across to it. If you will be burning with Nero, you may delete IP.BIN. If you will be burning with CDRECORD, hold on to this file, it will be needed later. You're directory should look something like this: For burning with Nero For burning with CDRECORD Setting up the WINCE directoryThe WINCE directory will not be provided with Sintendo for legal reasons. If you purchased a copy of a Windows CE game for the Dreamcast, then you legal own a copy of the libraries held therein, and are free to make a backup. I am told that the libraries used for "Midway's Greatest Hits" has all the files Sintendo needs. You will have to obtain these libraries on your own. If you have an image of the game, you can use IsoBuster (it has a simple interface) to extract these files. The complete Windows CE directory has 96 files, way more than Sintendo needs, but it is good to be safe. The Windows CE directory for Sintendo only requires 21 files, which can be downloaded from the download page of this site if and only if your read and agree to the full disclaimer. I can not be held responsible for the illegal use and/or copying of these libraries for use with Sintendo. Once you have found the Windows CE libraries, create a folder within your Sintendo directory and name it WINCE:
With all 96 files in the WINCE directory, it should look something like this:
With the 21 files in the WINCE directory that Sintendo requires, it should look something like this:
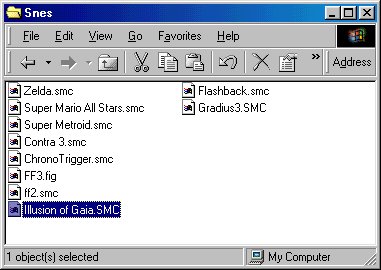
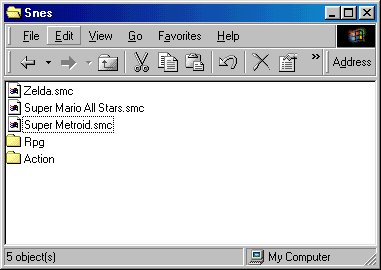
Setting up the SNES DirectoryThe SNES directory can have up to 128 ROMs or subdirectories within it (this will soon be changed to 256). Each subdirectory within the SNES directory can contain up to 128 (or 256, soon) ROMs or subdirectories, ad infinitum. It is recommended that this directory tree not go past 3 folders deep, i.e. SNES\RPG\Jap\ but not SNES\RPG\Jap\A-M\. The Subdirectories may be named whatever you wish, but their names should be readable and make sense to what is stored within them. All ROMs must have the extension .smc, if a ROM you have has an extension other than .smc, you should rename this file to have the proper extension. ROM filenames may be up to 31 characters including spaces, but may not have special Operating System characters, including ? * / : \ et cetera, and should only have a single . (period), which is used to seperate the extension from the filename. Having more than one period in a file name will cause Sintendo to not recognize the ROM. An unlimited number of ROMs may be located on the Sintendo CD, provided there are no more than 128 ROMs and subdirectories per folder and that the total space required does not exceed the space available on the CD media you will be using. To prepare the SNES directory, first locate ROMs for any games you own copies of and put them somewhere where you will be able to locate them later. I can not provide information on where ROMs may be located, nor may I provide you with ROMs or information regarding them. Once you have found all the ROMs you wish to burn with Sintendo, create a new folder within your Sintendo directory and call it SNES:
Copy all of your ROMs into this directory:
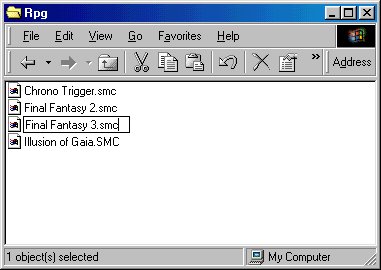
Create any folders you wish to have and move the ROMs into their respective folders:
Go through all of your folders and rename each file, giving them readable names that are desirable for a list of games, making sure all ROMs have the extension .smc:
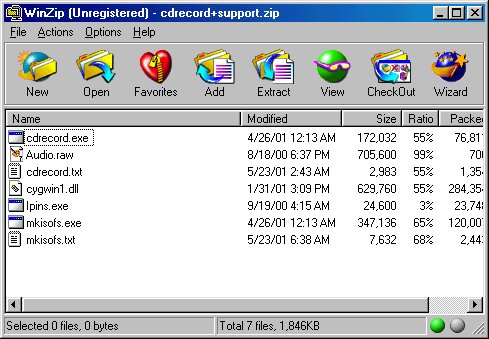
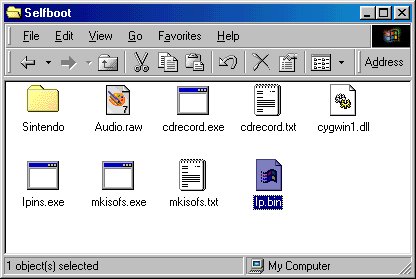
Repeat this through all folders until all ROMs have proper names and .smc extensions. Sintendo directory completeHaving finished all three steps, the Sintendo directory is prepared. If you are burning with Nero, you are ready to move on to Step 2: Burning to CD-R with Nero. If you will be burning with CDRECORD, there is one more step to complete: Setting up the Selfboot directorySetting up the Selfboot directory is simple. All that has to be done is that a few utilities must be placed in this directory for use when you burn Sintendo. All of these utilities may be downloaded from the download page of this site or from the following link: Download CDRECORD + Support files (510,121 bytes). Once downloaded, double-click on the file and it's contents should look like this:
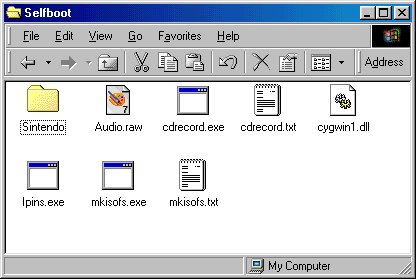
What all these files are will be explained momentarily. To set up the Selfboot directory, open the Selfboot directory in another window and drag all the files from the Winzip window to the folder; or, you can click the Extract icon (seen above) and browse to find your Selfboot directory and then click Extract. If you already had a Selfboot directory you've used to burn other self-booting emulators, it may ask to confirm overwriting several files. It should be ok to click either Yes or No in this instance. Once you've completed this step, your new Selfboot directory should look similar to this: (If you already had a Selfboot directory, there may be more files or directories)
Descriptions of all of the files listed here are as follows:
Once this is prepared, double-click on the Sintendo directory
to enter it, highlight the file Ip.bin and click the icon
cut
Once you have completed this step, you are ready to move on to Step 2: Burning to CD-R with CDRECORD. |